360 Video Pipeline
Editing 360 Video in FCP
The process of editing 360 video in FCP is the same as any other video but there are a few steps you need to be sure to follow.
1. Import your stitched clips into a new Event called 360 in FCP. Remember stitched clips will contain _er in the name.
2. Create a new Project (file > new > project) and give it an appropriate name but always end it with _360.
3. Drag your 360 clips onto the timeline in the order that you developed in pre-production. When the following window pops up change the settings to match what is displayed below:
4. Adjust each clip to show just the part of the scene you want to show being sure to edit out the start where you turn the camera on and the end where you turn the camera off.
5. Add transitions between each clip. Use the Fade to Color transition that can be found under Dissolves list.
6. Add a title at the beginning and credits at the end. Keep your text small. Large text will scroll around the entire screen and will not be easy to read.
7. Add appropriate music and sound effects if needed. Be sure the music does not drowned out the sound of the video clip.
8. Adjust your audio as needed.
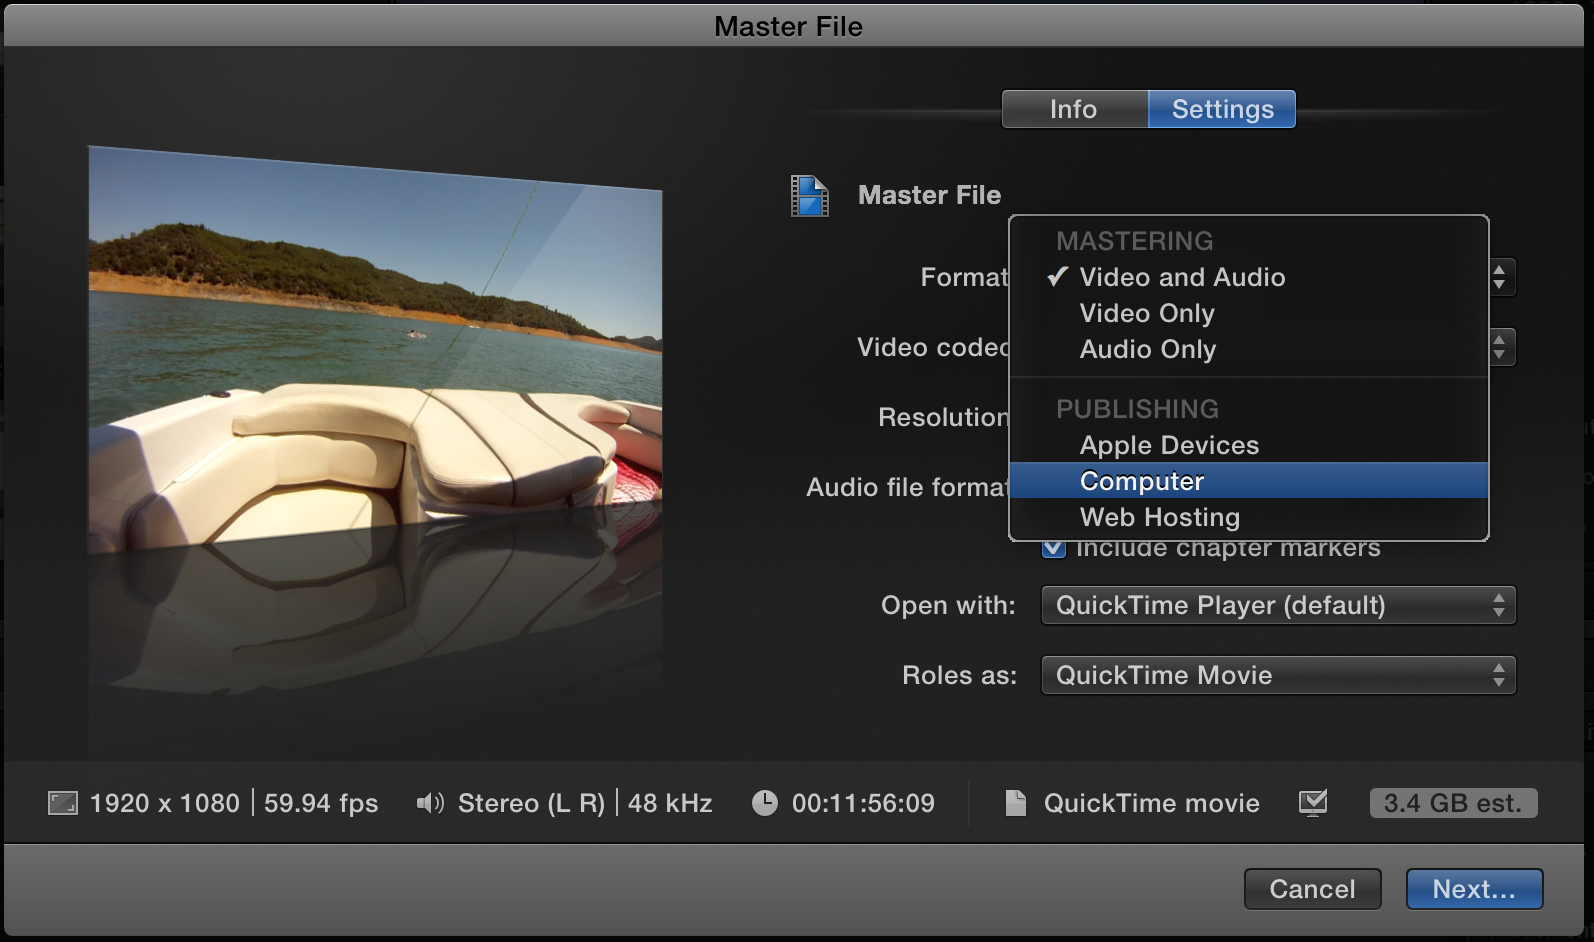
9. Export your video as an MP4 file being sure the name ends with _360. To do this you will need to change your settings when exporting the video to Computer instead of Video and Audio as the following image shows:

